
Simple Pillow Project: Make a pillow with stuffing
Would you like to make and sew a pillow with YOUR chosen fabric design/color? This post is a Step-by-Step Simple Pillow Project tutorial that will show you how to make and sew your own pillow.
This post has affiliate links, and with your qualifying purchase I earn a commission at NO extra cost to you.
Check out these F.A.Qs before starting your pillow
What type of paper can I use to make a pillow pattern?
You can make a pillow pattern on paper; saving the paper pattern if you plan to make more pillows in the future.
- You can buy pattern paper, paper on a roll, OR…
- 1) Tape together printer paper
- 2) Cut open a brown paper bag and tape together several pieces if need be
- 3) Use the white side of wrapping paper on a roll; some paper even has grid lines on the back side which is SUPER helpful!
You could also just cut out fabric to desired pillow size, making sure to include seam allowance in your measurements, using a transparent ruler and rotary cutter without a pattern.
How do you make a pillow Step by Step?
That is EXACTLY what this post is about-scroll down to see the directions.
How much fabric do you need to sew a pillow?
The amount of fabric will depend on what size you want your pillow. Example: In this project, for a finished 12″ X12″ square pillow, you will want TWO 13″ x 13″ pieces of fabric; one piece for the front and one piece for the back.
How much seam allowance for a pillow?
A 1/2″ seam allowance on all sides works just fine. You could do a standard 5/8″ but I find that is not necessary as you are not ‘fitting’ pillow pattern pieces to anything like you would for a garment pattern.
Make and Sew a Simple Square Pillow with Stuffing
This Simple Pillow Project will show you how to make a FINISHED 12″ square pillow.
Make any size pillow you’d like- just make sure to add 1/2″ seam allowances to all sides of your pattern or fabric pieces. (It’s not the end of the world if you forget to add seam allowances. Your pillow will be just a tad smaller than your planned size)
Supplies needed for the Simple Pillow Project
- Fabric: For this project- Make the actual pattern or fabric pieces 13″ X 13”. This size includes a 1/2″ seam allowance on all 4 sides.
- Bag of Polyfill Stuffing
- Basic Sewing Supplies
Directions for Making your pillow
Step 1– Pin the pattern to the fabric (OR just cut your fabric pieces to measure- no pattern needed)
Step 2– Use a rotary cutter with transparent ruler and mat, or sewing scissors, to cut out your fabric pillow pieces using the pattern edges as your guide.
Step 3– Decide if you’d like pointed pillow corners or curved pillow corners. If you’d like curved corners, use a curved edge to help draw new stitching lines on your fabric. You can see in the image below, the ’round edged’ item is lined up with the seam allowance lines. The finished curved edge of the pillow will depend on the size of your curved item. The item used in the image is not very wide and that will make for small curved corners.

Step 3– Will you want to add any lace, buttons or other embellishments to the pillow? (If not, move to Step 4.) If Yes, now would be the time to do that BEFORE you sew the pillow front and back together.
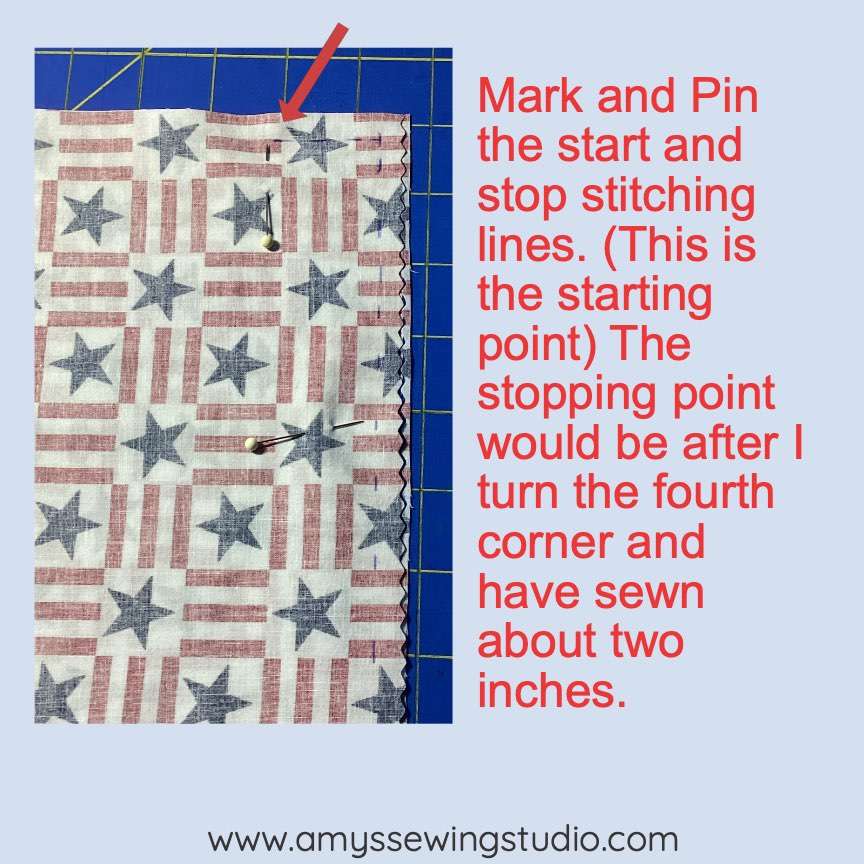
Step 4– Pin pillow fabric pieces, front and back, right sides together. Using a marking pencil, mark your start and stop lines for stitching. Draw two lines, on the wrong side of your fabric, where you will need to keep open for turning your pillow right side out and then to stuff. (This is the NO SEW area)
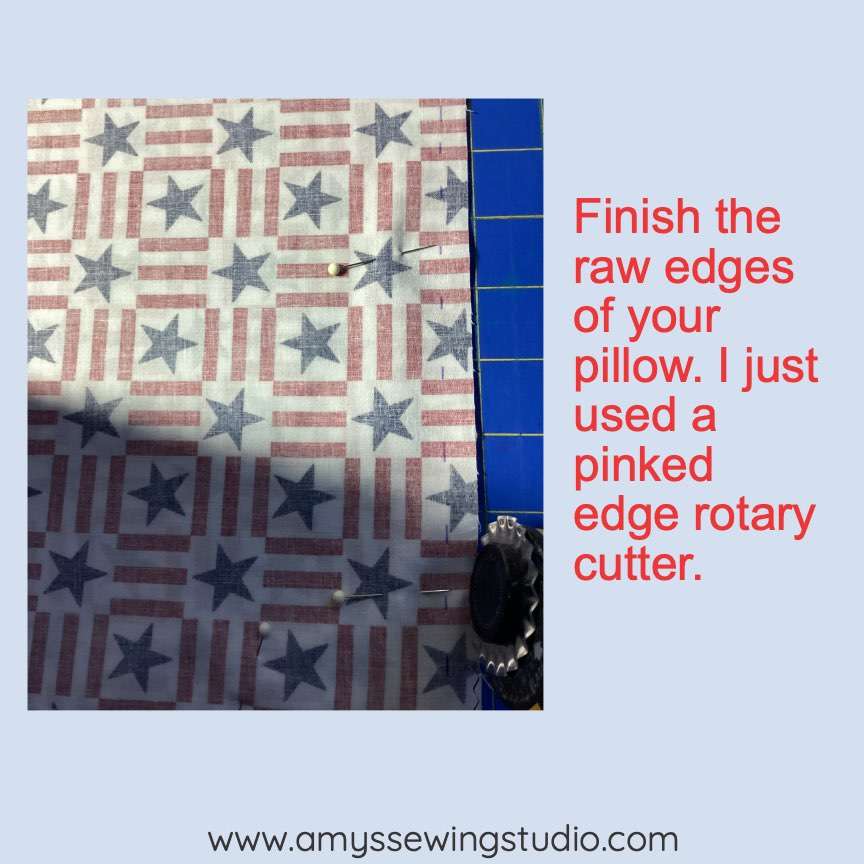
Step 5– Finish the raw edges of your pillow. I just used a pinked edge rotary cutter. Just make sure to carefully finish the raw edges of the un-stitched fabric opening; not to take off much fabric edge.
Step 6– Stitch around the pillow starting at one of the stitching lines, making sure you keep your needle in the fabric, before lifting the presser foot to turn the corner, and continue stitching until you come to your second mark to end stitching. P.S.- make sure to backstitch at the beginning and end of your stitching.
Step 7– Turn your pillow right sides out and press the fabric, make sure to fold the un-sewn edges (seam allowance width) of fabric to the inside of the pillow. Press the pillow, this will give you a pressed guide line for matching the fabric edges to baste closed after stuffing.
Step 8– Add stuffing to the pillow thru open edges. A ‘point turner’ or chopstick comes in handy for getting stuffing into the corners of the pillow.
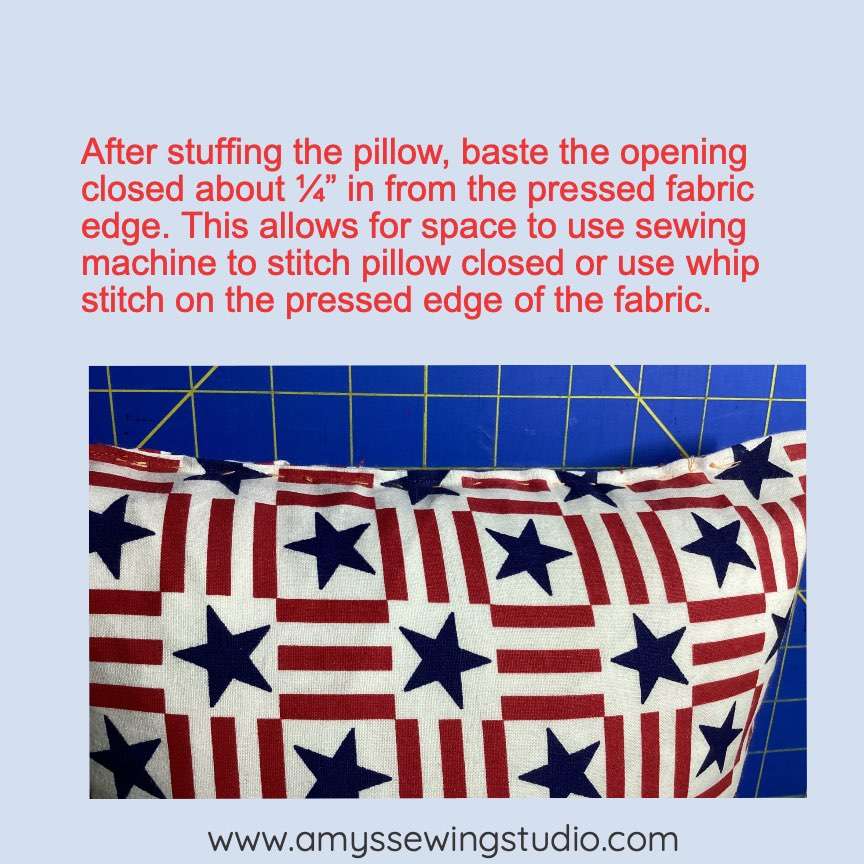
Step 9– Baste the opening closed about 1/4″ in from the pressed edge. This way as you baste, you are basting within the seam allowance width-sewing all four fabric layers together. (The four fabric layers are pillow top and bottom, and pressed fabric layers from the seam allowances.)
Step 10– Use a whipstitch to close the pillow opening, or sewing machine if you’d like the challenge.
If you would like to use the sewing machine, hand baste the opening closed. Then flatten pillow down by the basted opening and use pins, thru both layers of fabric, a couple of inches in from the pinned opening to keep a flat area to make it easier to use your machine to stitch the opening closed. after sewing is complete, remove pins and basting. You may need to re-fluff stuffing where you had the pillow pinned.

Congratulations you just finished a Simple Pillow Project!
Thanks for reading and Happy Simple Sewing to You!
For any questions about this post you can contact amy@amyssewingstudio.com